Preparation
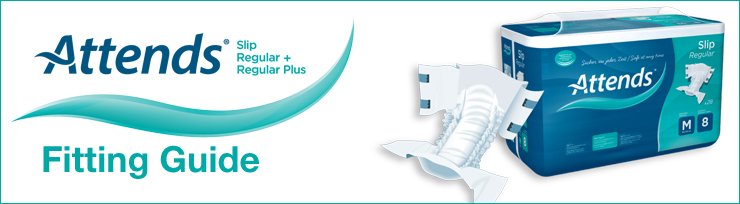
Step One
Measure the hips and waist and using the larger of these two measurements ensure that the correct product size is selected.

Step Two
Open the product fully and position the end with the wings and fixation tapes to the back ensuring that the wings are fully opened before applying the pad. Make sure the back sheet is on the outside and the soft white inner lining is next to the skin.
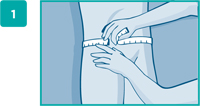
Step Three
Gently fold and cup the pad lengthways to ensure that the leakage barriers stand up.
Fitting
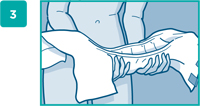
Step Four
Position the pad between the legs so that it fits snugly to the wearer and that it fits comfortably in the groin area. Use the wetness indicator to help to position and centre the pad.
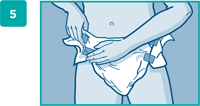
Step Five
Gently pull the wing around to the front of the pad and fasten the tapes.
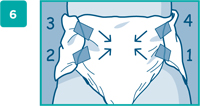
Step Six
Fasten the bottom tapes first in an upwards direction to give a close fit around the groin area and then fasten the top tapes in a downwards direction to ensure a snug, comfortable fit. When you remove the Slip lift the white tape off the blue tape.
Hints and Tips
Selection
- Consider selecting Attends shaped pad/pants before using Slips - they offer much greater discretion.
- Choose the Slip according to hip or waist size – whichever is the largest.
- Choose the absorbency based on the volume of urine passed. Start by choosing a lower absorbency number for example level 8 before moving to a higher absorbency for a more discreet and comfortable fit.
- Slips can offer effective management for people who may pull out shaped pads.
Fitting
- Ensure you keep the ruffles on the flexible leg gathers on the outside of the Slip – this keeps the waterproof backsheet away from the skin.
- Keep the adhesive tapes at the back when fitting the Slip – you then know it is the right way round.
- When fastening the Slip, fasten the bottom tapes first in an upwards direction and then the top tapes in a downwards direction to give a snug, comfortable fit.
- If the product is fitted when the user is laying down follow the same sequence as for fitting the pad in a standing position. To ensure the pad stays in position, place a hand on the back of the Slip when turning the client.
- Use the wetness indicator to centre the whole pad.
Changing
- Check the wetness indicator - if the wetness indicator has disappeared over half the length of the pad (60%) the product requires changing. If not the pad can be reapplied.
- Reseal and reuse the Slip when toileting if the product is clean and dry.
- When you unfasten the tapes the blue tape should remain in place on the product.
- Do not stick tapes to the skin.
- Clean skin as per your local policy.
- Clean from front to back.
- Avoid oil based creams if possible. Powders should not be used at all. These will affect the absorbency of the pad, preventing urine being absorbed and placing the skin at risk.
Leakage
- Check all aspects of fitting and assessment.
- Check that you have the correct size.
- Only increase the absorbency of the pad when you have checked it is not a fitting issue and following clinical assessment.
Disposal
- Roll up pad and dispose as per your Trust’s clinical waste policy.
- Do not flush the pad down the toilet.

Attends Slip Regular are tested and approved by proDERM,
Institute for Applied Dermatological Research